| swfchanGifShooter — A small program written in Java that makes it easy for those interested to create an animated gif image of a flash viewed on swfchan. It's designed to automate a lot of what otherwise can be done manually and then use ImageMagick to put together a optimized high-quality image file. Since it depends on an executable compiled for Windows the program only works on Windows. Though since ImageMagick exists for all platforms and the program itself is written in Java it would be possible to make it run fully on for example Linux, but as of yet I have not bothered with the extra work. Only if people come screaming out for a multi-platform version I might.
HOW IT WORKS 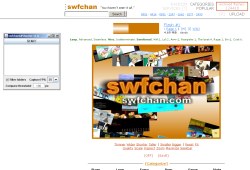
| Start the program. Browse to desired flash. Press the GET FILE button, view it (embed option). Press the START button in the program. It finds and records the flash on-screen. Don't scroll the page or ALT+TAB. | 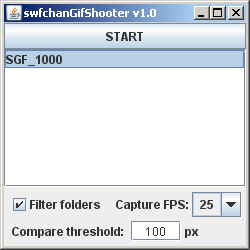
| Watch what you want to turn into a gif. Press STOP. The program will work with what it has got. A project folder is created, PNG files are written. It appears in the list, double click on it. | 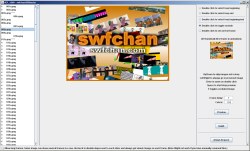
| The project window opens. Define the loop. Select beginning/end (double click images). Exclude images you don't want in the loop. Pick the image that will be first frame in your gif. Set frame rate and number of colors. | 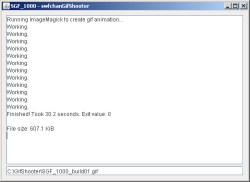
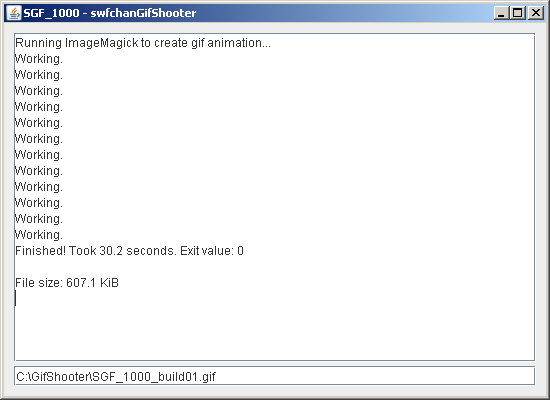
| Press Build! Wait until the magic has been cast. The gif animation has been created. Close this build window. | 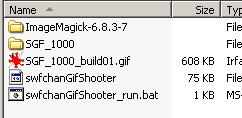
| Check the gif, drag and drop it into your browser.
Modern browsers should give reliable frame rate. | 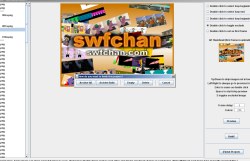
| Tweak stuff if the gif wasn't OK, rebuild. Press the "Finish Project" button. Archive project (keep files, filter project folder in list). Or delete all to free up disk space. Can also just close program and delete manually. | 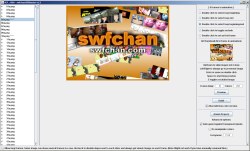
| Version 1.3 (This image has nothing to do with the steps above, it is just a more recent screenshot of the project window.) |
 Note: This gif was made using version 1.0 of GifShooter.
The quality is better in the current version as you can see here.
DOWNLOAD GifShooter_v1.3.rar (36.7 MiB) — Extracts to 114.6 MiB. Includes ImageMagick 6.8.3-9. If you can't start the program it's possible that Java haven't updated the path environment variable. What you do then is open swfchanGifShooter_run.bat in notepad (you can probably right-click on it and select "edit"). Replace the two words [start javaw] with this: [start "" "C:\Program Files\Java\<folder>\bin\javaw.exe"]. Notice that the quotes must be included. The brackets are not included. The <folder> string is the name of your folder where Java is installed, for example jre6. If the path is not where Java is on your machine you change the whole path of course. Important: For the program to be able to discover the orange embed border on swfchan it must be 6 pixels wide. If you zoom the view in your browser this changes so before you record make sure you haven't zoomed anything (can happen by mistake since CTRL+scrollwheel usually zooms in today's browsers). You can reset the zoom to normal by pressing CTRL+0 in most browsers (that's the number zero, not the letter O).
TIPS - Double click swfchanGifShooter_run.bat to start the program. Java (6) is required. It terminates if you close the main window.
- You can control the flash like normal while you are capturing screens. Play it, change scenes, make stuff happen etc.
- If you are capturing a flash loop of some sort, let the visuals repeat a few times before stopping the recording. One of the loops might have a frame skipped due to computer lag, then you can avoid making the gif from that loop. It also increases the chance of the exact same frame to appear.
- When the exact same frame appears (as it often does in flash loops) it is marked by the program with a "dupeof" text. The image that is duplicated is marked with a plus. If you set the loop to begin on a plus-marked image and end on the image before its "dupeof" then the gif will very likely loop perfectly and seamlessly.
- Sometimes an image appears to be a dupe of another, however there is something that makes it unique. Can be for example a button glow animation. The image won't be marked as a "dupeof" by the program and you have to manually see that it's a good point to begin/end the gif loop.
- The frame delay in gifs are defined in hundreds of a second and must be an integer. 1 (max speed) = 100 FPS, 2 = 50 FPS, 3 = ~33 FPS, 4 (default) = 25 FPS, 5 = 20 FPS, 6 = ~17 FPS, 7 = ~14 FPS. 100/X = Y FPS. Try to match the tempo of the flash. If that can't be done it's often best to slow it down a bit.
- Many programs (and browsers) are unable to display gifs in the correct frame rate, especially if the image's dimensions are large. If you set a frame rate of 4 and it looks like the image is played in slow motion for you - don't decrease the frame delay! The gif will then play too fast on computers that can display it correctly. Just trust the frame rate setting you picked.
- Used the preview button in the program to check the tempo of the animation. You can change the frame delay while the preview is running.
- During recording all images are kept in memory to improve performance and make sure that no CPU is wasted so that the flash will lag as little as possible. This makes the program unsuitable for longer recordings unless you have a lot of RAM and allow the JavaVM to access it.
- Getting out-of-memory issues? To allow the JavaVM to use more memory, open swfchanGifShooter_run.bat in notepad. Change -Xmx1024m to for example -Xmx2048m to give the VM two GiB of RAM instead of one.
- The capture area is defined by the orange border that goes around a embedded flash on swfchan. The whole border must be visible when you press the start button.
- Resize the embedded flash on the site to resize the final dimensions of the gif. Making a bit smaller will reduce file size a lot and the recording process will need less CPU since less area needs to be covered.
- Use the Smaller/Bigger links below the flash to resize the embedded flash. If you need more precision you can resize your browser window and then press the "Fit"-link below the flash. If you need to be able tp specify height/width exact you can type in the numbers before you press the GET FILE button.
- Sometimes a flash has empty space on the sides that you don't want to record. You can then press the "Scale"-link (usually twice) below the flash to switch it to noScale render mode. Now its easy to crop away the edges using the Thinner/Shorter links.
- You can move the viewport of the flash by using the "Zoom"-link below the flash and then by pressing "Switch to zoom rectangle". If you for example add 50 to each X value you will move the content of the flash 50 pixels to the left. Think of it like you are moving the "camera" that views the flash.
- Sometimes the flash has a movieclip of a button, an arrow or a logo or something that animates faster than the main visuals. This means that two frames next to each other look the same except for a few pixels that have a different color thanks to that movieclip. The "Compare threshold" in the program lets it ignore the change of a few pixels and still find a dupe of the previous image. If the flash has a 20x20 button that flashes like crazy you can increase the threshold to 20*20 = 400 px to ignore that button.
- If you can't seem to record a specific few frames no matter how many times you try setting the "Compare threshold" to 0 before you start recording. It's not recommended to start with 0 though since it allows the program to ignore small changes between visuals caused by antialias.
- Antialias in flash adds a lot of colors to the captured image, you can use the "Quality"-link below the flash (if the right-click menu doesn't work in the flash) to set this to medium quality. It'll still look good but it gets rid of many extra colors. Sometimes even low (no antialias) can be okay since a gif animation has limited color count anyway.
- Max color count in a gif is 256. The default is set to 192, a good value for most flash animations and one that saves a little on the file size. Reduce this further if the flash animation is very simple. Increase to 256 if there's many colors, gradients and shades. It's a good idea to try lower first to see if it looks okay.
- Some gifs with 256 colors may look better AND have a smaller file size than the same with 192 colors. I think this is thanks to a optimization spell in ImageMagick. It can be wise to always check how the 256 color version turns out of your animation. If it's not that much bigger than the 192 color version it might be worth to use it instead and if it's somehow smaller in file size you should definitly use it.
- Removing frames (excluding them) saves more bytes than reducing color count. Recording with smaller dimensions saves the most.
- The "allow long frames"-checkbox at the bottom of the project window will show images that are dupes of the previous image. Having these in the gif does not increase the file size because they are actually not put in there, just that the previous frame is set to be displayed longer.
- Many flashes have dupe frames in their animation to change the tempo at certain points, in gifs it is often desirable to have visual change on each frame however. That's why "allow long frames" is unchecked by default. It's up to you to decide if the gif does look better with the dupe frames.
- You can pretty much cut a gif's file size in half by excluding every second image. Remember to double the frame delay to compensate for the halved number of frames.
- Try to strive towards smooth motion where equal change happens between frames. If movement is very small between frames you can probably exclude one of them.
- Watch out so that the first and last frame isn't the same, this will make it look like the gif stops briefly upon repeat.
- You can add/duplicate/remove images manually in Windows Explorer before you open the project window if you like. It's possible to make a gif from your own images that you haven't gotten from recording with the program. Only PNG images are supported.
- Remember to pay attention to the gif thumbnail, the first frame in your animation. This is what most often will be displayed as a thumbnail on imageboards/galleries etc when you upload them. Make sure the image looks good and gives a good idea of what the gif shows! Use the set-as-first-frame double-click.
- You define your loop by double-clicking in the list of images (the keyboard can also be used if the list has focus). Change what your double-clicks do by using the radio buttons at the top right of the project window.
- When double-click sets both beginning/end it moves the one that currently are closest to what you are double-clicking on. The first two double-clicks always put out the beginning and end however.
- You can, if you want to, replace the included ImageMagick version with a newer one. Just make sure the folder name starts with "ImageMagick" (remove the old folder).
- It's not rare to see a flash that would loop perfectly if it wasn't for the "camera" to move around on the scene. If you are lucky the visuals are a movieclip that is being moved around on the main time line, then you can simply right-click and uncheck "play" to stop playback. The movieclip will however keep animating and now you can capture a seamless loop.
VERSION HISTORY 1.0 (5mar2013) r1 + Initial release. 1.3 (14mar2013) r2 + Colors now defaults to 256 instead of 192.
+ Can build a low-color version in the same go as the normal color version.
+ Fixed height issue of thumbnail preview.
+ Made tooltips easier to read.
+ Made right-side interface of the project window more compact.
+ Added framerate-to-FPS tooltip cheat sheet.
+ Now shows number that counts current frames in animation.
+ Improved quality of resulting gif animation.
+ Advanced options (safe-guard, manipulate colors and fuzzyness).
+ Now reflects build folder in image list when opening old projects.
POSSIBLE PLANNED FEATURES (maybe) + Type in desired FPS instead of frame delay in the project window and have the program try to match the FPS as closely as possible. The tooltip cheat sheet is good enough.
+ Duplicate images from the project window. Can be done manually now by copying the actual image files.
+ Filter away every second image in the list to cut the number of images (and file size) in half. Can be done manually now in the OS file system.
+ Make a gif go in reverse (also back-and-forth animation). Can also be done manually by copying and renaming files.
+ Option to create both 256 color and 192 color versions of the gif during the same build session. Done!
+ To be able to make borderless gifs.
+ Record area by manually setting the rectangle on screen.
Having trouble with getting it to work? Questions or comments? Should I maybe change the word "fuzzyness" to "fuzziness"? I'd be happy to chat about the GifShooter in the service discussion thread. |